- Less is more. Paring and stripping down my work and not throwing the kitchen sink at it can work. From initial OTT graphics, effects and animation by getting the the essence of the piece and simplicity the message can be stronger.
- Ideas, concept and the work should dictate the style not the other way around. With the Poetic Love piece I was developing with my grandma I tried to shoehorn it into a preconceived style and it was round peg, square hole. Similarly with the Siblings piece I went OTT on style at the start. I need to consider getting form to serve content and character and narrative in my arts practice more.
- Installations can inform, educate and entertain and documentary work and ideas can be interpreted in an installation.
- Working on three screens and to get them interacting offers huge narrative and character as well and storytelling opportunities.
- I actually do like and can enjoy and appreciate installations and have got over my hang-ups about them. As with everything there are the good and bad but I need to experience even more and in-situ if possible.
- Working with 3 kids and three sets of kit for 3 screens is hard. Meticulous planning and execution is needed.
- A lot of discipline is needed when working with family. A separation of parent and film-maker is needed to retain objectivity about the work and avoid too much subjectivity. Impossible to do 100% but you need to almost operate two personas. Dad as dad AND dad the filmmaker.
- Post production with three screens and narratives that are interdependent is a brain melt. Detailed planning and preparation and organisation is a must.
- I can extend my practice into other interesting areas. Far from being separate from my previous practice they can both influence and inform each other.
- More research testing and understanding is needed. In future i would do lots more testing and get a close as I could to a full scale mock up of the installation in advance of the screening of the piece. It was very close to the wire.
- More experimentation with technologies to ease the screening of the installation.
- A clarity of vision is great but I need to experiment more and be more flexible. That said the final installation structure in the gallery itself is very close to how I imagined it. The content on the screens however has been the real journey.
- More looking around at other practitioners has opened my eyes to lots of possibilities. This is from not only moving image based work but also from other art spheres and disciplines.
- Balance looking around for inspiration with not being too influenced by it. I have found it is far too easy to pick up lots of tropes and ideas but sometimes they can influence my work too much. I feel I need a clarity of vision and idea before doing too much research or it is too easy to be influenced by others.
Thursday, 12 May 2016
SIBLINGS: REFLECTIONS ON PROJECT
This project has been a huge learning curve and there have been many lessons learnt from this project and I have outlined many of them below.
Wednesday, 11 May 2016
SIBLINGS FINAL POST-PRODUCTION
Following on from the second shoot and managing to get all of the lip-synch voice over recordings done I finally had all of the footage, sound and assets at my disposal. The main issue that I was going to face was time. With the delay in getting the footage all shot although I had been editing and working on the footage that I had shot there was a lot still to do and a deadline looming. An ill wife for the past month and a busy time at work was not helping either.

The editing carried on in a very similar vein to the initial editing as far as workflow, organisation and using the software went that I have mentioned in my earlier editing post. Similar issues cropped up again and these have been listed below.
LIP-SYNCHING AND SOUND ISSUES
Nearly impossible to get 100% due to phrasing, inflection, tone and pacing. Lots of man hours BUT have got it all pretty close. People obviously will know that the voices of others coming out of the boys mouthes are not their own as the boys are talking themselves in there own voices in the piece. HOWEVER they do need to be as close as possible and I am getting there. The process of this is lengthy and outlined below.
GRADING THE FOOTAGE
Needs doing but I will leave to the end if time. I am warming to the different types of footage of the boys rather than a uniform one which due to lighting and white balance would have been near on impossible to keep a constant across three shoots over three shooting days in two locations.

LENGTH OF THE PIECE
Due to time constraints to complete the final edit which I envisage being about 20 minutes and the screening time for my MA tutors being only 10 minutes I have worked towards a 10ish minute edit. This will include all of the elements of the piece
STRUCTURAL & NARRATIVE DESIGN
Getting there in my opinion but it has been an uphill battle. I feel the start and the end work well to bookend the piece. Throughout I wanted to mix up all of the opinions on the boys and their own thoughts. I decided that they needed more space and as edits developed so did the screen-time devoted to the boys themselves and their on screen antics. The voices of others commenting on them grew less and less and were almost insterstituals in-between their own thoughts and added a different pace. Keeping these brief allowed more comments on the boys in the piece and focussed on them and their POV more. Keeping the voices of others brief also made their views seem more blunt and one dimensional which I feel works as snapshots of opinions of the boys. The fact that these were shot single camera and then edited together so the boys do not interact added to this.
AUDIENCE FEEDBACK ON EDITS (NOT SCREENING)
I have screened rough cut elements in various of stages throughout as well as to my MA peers and their feedback was a real help to crafting the final version. They were not surprisingly similar to the feedback from my MA peers from the crits we had. Some points are outlined below.
PREPARING FOOTAGE TO BE SCREENED
The issue here was if I would have been able to 100% bang on synch all of the footage from the projectors together so they would be exact. Time, technical and financial limitations means that on this screening that this will not be the case. From my experiments trying this out a half second delay between screens could be encountered so I added this gap during my edits. Further experiments with MIDI, SDS and bluetooth may bear fruit but for this exhibition for my tutors are simply not going to happen. For this reason I added a little more of a pause between comments were I could and they were shot single scree. Also where the boys were recorded three camera and the sound from one spilled into one another I went in and cleaned it out. This was so if it did not synch super close the voices would not overlap or seem too weird.

The editing carried on in a very similar vein to the initial editing as far as workflow, organisation and using the software went that I have mentioned in my earlier editing post. Similar issues cropped up again and these have been listed below.
LIP-SYNCHING AND SOUND ISSUES
Nearly impossible to get 100% due to phrasing, inflection, tone and pacing. Lots of man hours BUT have got it all pretty close. People obviously will know that the voices of others coming out of the boys mouthes are not their own as the boys are talking themselves in there own voices in the piece. HOWEVER they do need to be as close as possible and I am getting there. The process of this is lengthy and outlined below.
- Recorded the boys in-vision doing saying the parents lines
- Take the clips and put them in a timeline on Adobe Premiere Pro.
- Cueing them up to exact points on the timeline. So the boys audio to start on 1:00 minute.
- Using the play-head in Adobe Premiere Pro and also the waveform as a guide to the start.
- Also the picture of the boys on display and their version of the statement.
- The above: timing, play-head, boys in vision and waveform it all act as a guide for parents.
- Play the clip through so the parents can get the boys timing, inclination, phrasing and tempo.
- Then keep recording on a TASCAM digital recorder the audio until they got it bang on.
- Then the audio files of the parents audio that were recorded are imported into Premiere Pro.
- The audio files are then synched up to replace the boys saying the lines.
- Minor alterations in timing, starting and spacing are added to get the lip-synch to look right.
- Leaving a minimum of 1 second between boys talking as this allows for lagging in the playback. It does make it look a little stilted BUT this added to the effect.
- The boys are in the clip with their lips moving and the sound from the parents coming out.
GRADING THE FOOTAGE
Needs doing but I will leave to the end if time. I am warming to the different types of footage of the boys rather than a uniform one which due to lighting and white balance would have been near on impossible to keep a constant across three shoots over three shooting days in two locations.

LENGTH OF THE PIECE
Due to time constraints to complete the final edit which I envisage being about 20 minutes and the screening time for my MA tutors being only 10 minutes I have worked towards a 10ish minute edit. This will include all of the elements of the piece
STRUCTURAL & NARRATIVE DESIGN
Getting there in my opinion but it has been an uphill battle. I feel the start and the end work well to bookend the piece. Throughout I wanted to mix up all of the opinions on the boys and their own thoughts. I decided that they needed more space and as edits developed so did the screen-time devoted to the boys themselves and their on screen antics. The voices of others commenting on them grew less and less and were almost insterstituals in-between their own thoughts and added a different pace. Keeping these brief allowed more comments on the boys in the piece and focussed on them and their POV more. Keeping the voices of others brief also made their views seem more blunt and one dimensional which I feel works as snapshots of opinions of the boys. The fact that these were shot single camera and then edited together so the boys do not interact added to this.
AUDIENCE FEEDBACK ON EDITS (NOT SCREENING)
I have screened rough cut elements in various of stages throughout as well as to my MA peers and their feedback was a real help to crafting the final version. They were not surprisingly similar to the feedback from my MA peers from the crits we had. Some points are outlined below.
- They loved the bits of the boys together as did I so more of this was added.
- Liked the newer additions of the boys questioning each other and responses.
- Short and sweet on the views of others was liked best in - make their points - then out.
- The three screens of the same son also went down well and added another dimension.
- They liked the boys simply just being on the screen Those with kids recognised traits of their own, they realised that they were playing a little for the camera at times but added some entertainment and fun. They also pointed out that as two of them looked very similar Jacob and Noah their poses and body language helped through watching to tell them appart.
- The MES worked well with the plain black background
- Sound was generally good but a few minor issues were pointed out over levels.
- Most did not really notice the difference between the images in terms of lighting, so did not see the need for grading. When I did point it out they did then notice but it did not bother most of them. The only people who did pull me up on it were a couple of media teachers and editors.
- The feedback from no real explanation as to the messages, values and ideology generally hit the nail on the head. There was enough mention to get the teachers dues to mention of class, school etc. Most of the audience pieced together the duality of voices of myself and my wife as the parents. The Psychologists was not as successful but generally most did get that it was an experts voice due the tonality of it and distancing language used "first born child" etc.
- The title siblings 11-10-8 worked well and did frame the piece. Some confusion over if it may be a date but made sense once explained it was the boys ages at the time of recording and could be a series re-visited in 10 years then being 21-20-18.
LAYING OFF THE FOOTAGE
Due to editing the footage on three separate tracks one for each screen NOT son the process was not too complicated. It simply involved exporting each track individually. I did have to go through each track once separated with a fine tooth-comb to alienate any sound or picture issues which took a lot of time but it did work well.
The issue here was if I would have been able to 100% bang on synch all of the footage from the projectors together so they would be exact. Time, technical and financial limitations means that on this screening that this will not be the case. From my experiments trying this out a half second delay between screens could be encountered so I added this gap during my edits. Further experiments with MIDI, SDS and bluetooth may bear fruit but for this exhibition for my tutors are simply not going to happen. For this reason I added a little more of a pause between comments were I could and they were shot single scree. Also where the boys were recorded three camera and the sound from one spilled into one another I went in and cleaned it out. This was so if it did not synch super close the voices would not overlap or seem too weird.
Monday, 9 May 2016
SIBLINGS STUDIO SHOOTS 2 & 3
STUDIO SHOOT 2: 5/5/16
Heading back to the studio for the second shoot I was looking to put right all of the things that did not work too well on the first shoot and to pick up and try out some new things, techniques and approaches that came out of the first shoot. Getting the studio set up was far easier as I had the plans from the last shoot so staging it and setting up all of the lighting the same as the last shoot took far less time but still took about an hour. The family once again came over albeit with a little more trepidation following the issues from the last shoot. I had skinnied down the questions, discussed things through with the boys beofre the shoot and had planned all that needed doing down to a realistic hour and a half. They arrived at the same time but this time we were ready to shoot by 5:15.

HOWEVER disaster struck. Bands had been noisily rehearsing as normal in the Film theatre opposite the TV studio but they always finished by 5:00 on a Thursday and their was no noise from the film theatre so I assumed they had. The first recording of the boys initial pieces to camera went well BUT then a band struck up. We managed to record another short piece and then the band sparked up again. When I checked the sound it was evident all over my recording was their performance and there was no technical way to avoid it. Visiting the Film theatre where the bands were and speaking to the lecturer I was informed that they were sound checking until 6:00 and then they were putting on a performance until 9:00. They had an audience coming in and there was no way to stop their bands! I stressed that it would have been good to be notified as they were NEVER in after 5:00 but they said they did not think to. I begged for any quiet time and they did say that I could have 10 minutes from 5:50-6:00 as after that the audience were arriving and the performance would begin.
All this was far from ideal but was better than nothing and would be the last time I could get the boys into the TV studio and meet my deadline so I would have to roll with it. Returning to the TV studio and briefing the boys we would need 100% focus for 10 minutes. I edited the questions and statements I needed to record of the boys down to an absolute minimum and focussed solely on the ones where I needed all three boys interacting off each other at the same time. We managed to just about get this footage as there was no way it could be done anywhere but the TV studio due to kit and set up. I then resolved myself and the boys to having to create a mini one camera set up at home to record the other bits. They received a well overdue trip to the lego section of Toys R Us and a KFC as their reward on the way home.
HOME STUDIO SHOOT: 7/5/16
There were a few of the elements still left to record most importantly the parents comments and the idea of having all 3 images of one of the boys on all the screens at the same time so it would look like they were chatting to themselves but as other people also if you like. To do this I had to create a home studio set up.

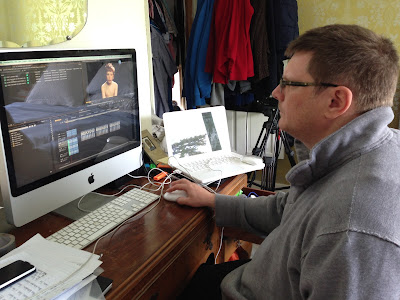
The kit for this was the same camera and sound setup Canon 600D with mains power, TASCAM DR-70D audio recorder, Senheisser rifle mic, mic stand and leads etc. HOWEVER the tricky bit was squeezing it all into one room. I chose the largest (our bedroom) and had to black out the windows with foil and set dress with a large black curtain I had "borrowed" from the TV studio. I also had to get hold of 3 lights (3X 300W Ianarro's) as there was obviously no lighting rig available. Space was at an absolute premium and kit was everywhere as you can see from the photos but as a "makeshift" studio it worked.

The image on screen looked great BUT whilst trying to match the lighting and white balance as best as I could and the boys hair and appearance with the studio shoot it was really hard. This is likely to create issues down the line but there was simply no avoiding it due to the fact of a different time, location and lighting sources. the sound will also feel very different which will be OK if the footage of the shoots appears in the same section. BUT if clips from different shoots appear side by side they will look different. This may be incorporated into the overall feel though perhaps as it does add an interesting texture and dynamic.

The shoots went fairly well and the boys were more relaxed and as I have mentioned before filming is a lot smoother when they are filmed individually. I recorded the pieces where they are voicing their parents views on their personalities and this went well. Following this I did manage to stage the boys shots where they would be individually on all three screens at the same time and interacting. I did a dummy test for this directing them as to where they would need to look and pretending the other screens were and guesstimating how long they would have been speaking for therefore how long to keep their gaze there. It was not an exact science but it went OK so I got all of these filmed too.
Heading back to the studio for the second shoot I was looking to put right all of the things that did not work too well on the first shoot and to pick up and try out some new things, techniques and approaches that came out of the first shoot. Getting the studio set up was far easier as I had the plans from the last shoot so staging it and setting up all of the lighting the same as the last shoot took far less time but still took about an hour. The family once again came over albeit with a little more trepidation following the issues from the last shoot. I had skinnied down the questions, discussed things through with the boys beofre the shoot and had planned all that needed doing down to a realistic hour and a half. They arrived at the same time but this time we were ready to shoot by 5:15.

HOWEVER disaster struck. Bands had been noisily rehearsing as normal in the Film theatre opposite the TV studio but they always finished by 5:00 on a Thursday and their was no noise from the film theatre so I assumed they had. The first recording of the boys initial pieces to camera went well BUT then a band struck up. We managed to record another short piece and then the band sparked up again. When I checked the sound it was evident all over my recording was their performance and there was no technical way to avoid it. Visiting the Film theatre where the bands were and speaking to the lecturer I was informed that they were sound checking until 6:00 and then they were putting on a performance until 9:00. They had an audience coming in and there was no way to stop their bands! I stressed that it would have been good to be notified as they were NEVER in after 5:00 but they said they did not think to. I begged for any quiet time and they did say that I could have 10 minutes from 5:50-6:00 as after that the audience were arriving and the performance would begin.
All this was far from ideal but was better than nothing and would be the last time I could get the boys into the TV studio and meet my deadline so I would have to roll with it. Returning to the TV studio and briefing the boys we would need 100% focus for 10 minutes. I edited the questions and statements I needed to record of the boys down to an absolute minimum and focussed solely on the ones where I needed all three boys interacting off each other at the same time. We managed to just about get this footage as there was no way it could be done anywhere but the TV studio due to kit and set up. I then resolved myself and the boys to having to create a mini one camera set up at home to record the other bits. They received a well overdue trip to the lego section of Toys R Us and a KFC as their reward on the way home.
HOME STUDIO SHOOT: 7/5/16
There were a few of the elements still left to record most importantly the parents comments and the idea of having all 3 images of one of the boys on all the screens at the same time so it would look like they were chatting to themselves but as other people also if you like. To do this I had to create a home studio set up.


The image on screen looked great BUT whilst trying to match the lighting and white balance as best as I could and the boys hair and appearance with the studio shoot it was really hard. This is likely to create issues down the line but there was simply no avoiding it due to the fact of a different time, location and lighting sources. the sound will also feel very different which will be OK if the footage of the shoots appears in the same section. BUT if clips from different shoots appear side by side they will look different. This may be incorporated into the overall feel though perhaps as it does add an interesting texture and dynamic.

The shoots went fairly well and the boys were more relaxed and as I have mentioned before filming is a lot smoother when they are filmed individually. I recorded the pieces where they are voicing their parents views on their personalities and this went well. Following this I did manage to stage the boys shots where they would be individually on all three screens at the same time and interacting. I did a dummy test for this directing them as to where they would need to look and pretending the other screens were and guesstimating how long they would have been speaking for therefore how long to keep their gaze there. It was not an exact science but it went OK so I got all of these filmed too.
Thursday, 5 May 2016
SIBLINGS: FINAL INSTALLATION TESTS AND KIT LIST
I considered and experimented with all of the following in the run up to deciding how to set up my installation in the TV Studio at Suffolk New College. I chose this venue due to it being the right size to fit in three large screen set up, its ability to be blacked out and the lack of a similar space available at UCS for the project.
- 3 Projectors ideally the same and with similar picture quality.
- 3 ways to play the video content. Possibly laptops OR buy some media players.
- 3 VGA leads to connect the laptops or media players to.
- 3 Speakers or sets of speakers. Ideally with own built in amplification. To run from above.
- Leads (phono OR mini jack) about 3-4 metres long to connect speakers to media playing devices.
- 3 plinths OR a table with a black blanket etc to cover to mount projectors on.
- 3 16:9 screens to project onto. Size a maximum of 1.6m by 0.9m to allow for set up.
- Cord, fishing line or string to hang projection screens from the lighting rig.
I tested a variety of versions of this kit basically on laptops plugged into the projectors. I did this without the hanging screens I propose to use as due to time and availability of the location I can only install nearer the exhibition time.
TECHNOLOGY CHOICE
From these the set up that worked best was the three lap-tops and projectors. I did consider players and DVD options but laptops worked just as well under testing. I did consider TV screens but I felt this did not give me the scale and impact I was after as I could not get hold of three that were big enough. This was mainly due to a cost consideration and also time and technical aspects to buy and install all the software and hardware needed. These were 3 laptops equipped with Quicktime player so they would play the clips linked to three projectors with VGA leads. I did look at spending on the media players as they would eliminate the need to have laptops to hide in the set/exhibition space somewhere. This I felt could be done fairly easily under a table holding the projectors and the black curtain hiding this with the laptops underneath. As far as the sound went I wanted each screen to have its own speakers set up behind them so it would look like the sound was coming from the screens and they were talking to you. I managed to source three sets of dynamic speakers running off their own power and purchased three 5 metre mini jack to phono cables to run from the laptops to the speakers.


HIDING THE TECHNOLOGY
When I have been to galleries to look at video installations if projections are used rather than screens they are either back projected as I mentioned earlier or the projectors are on view. I am happy to keep the projectors on view BUT will need to hide the lap-tops. This will be done by setting up a table for the projectors to get them some hight for the projection, covering it in a black fabric and hiding the laptops underneath. The speakers will be raised off the ground by three black plinths and they will be connected by black cables.

SCREENS, SIZE AND BUILDING.
I did consider getting free standing screens but I did not want the clutter and loved "NOW" by Chantal Ackerman where she had slightly transparent perspex screens suspended from the ceiling and back projected onto them. My budget could not run to perspex (this idea would have to wait for another day) but I could suspend screens from the lighting rig. I have worked up a prototype screen. I made this using lengths of white photography backdrop paper from a spool I sourced. I will be attaching thin lengths of wood at the top and bottom the top one to fix and hang it from the ceiling and the bottom one to get the paper to hang straight. This worked well. lengths of strong enough fishing line or cord will secure these to the lighting rig.

Screen size was determined by the space itself and how far the projectors had to be from the screens to fill them. The bigger you needed the image to be the further away the projector needed to be and I ran some tests on the projectors to work this out. I also made lots of measurements of the studio space to determine its physical size and also where sockets and lighting rigs were for fixing the hanging screens to and to enable planning of the screen set up. the studio is 5.5m deep by 5m wide inside the black curtained area so this was the space I had to work with.

From looking at the measurements of the space I began to consider screen size. I wanted the biggest screen size I could find. I discovered that three widescreen 16:9 100' screens (221cm by 125cm) would fit but the angles that the screens would be at would be too tight to work with the video footage itself. They would also have to be too close together and the projectors would have to overlap to be far enough away to project fully onto a screen that big. this would also distance the audience from the piece as they would have to stand way back to avoid interfering with the projections which I did not want. 84" screens(186cm by 104cm) worked better but still the angle of the screens was also too steep and there was no space between the screens and the projectors would still have to be set too far back to allow the audience to get close avoiding the immersive experience I was after.

The ideal compromise was 72" screens ((159cm by 90cm). These allowed for a shallower angle if set up properly see right image below and allowed for the projectors to be set on the table 225 cm from the screen. Whilst still not exactly what I was after i did not want to compromise screen size any bigger as it kept the audience too far away. This is the set up I will be going with.

THE INSTALLATION SPACE
This will be a black box lit only by the screens and projections. One screen in the middle with two angles at about 30 degrees either side of it. All the screens will be the same size and at about eye level suspended fro the lighting grid. The projectors will be central on a table off the ground and this will be covered by black material with the laptops hidden away underneath. Speakers will be positioned behind each of the screens attached to the laptop playing their projection and therefore their sound. There will be a brief overview of the piece on the exhibition door explaining it.
TECHNOLOGY CHOICE
From these the set up that worked best was the three lap-tops and projectors. I did consider players and DVD options but laptops worked just as well under testing. I did consider TV screens but I felt this did not give me the scale and impact I was after as I could not get hold of three that were big enough. This was mainly due to a cost consideration and also time and technical aspects to buy and install all the software and hardware needed. These were 3 laptops equipped with Quicktime player so they would play the clips linked to three projectors with VGA leads. I did look at spending on the media players as they would eliminate the need to have laptops to hide in the set/exhibition space somewhere. This I felt could be done fairly easily under a table holding the projectors and the black curtain hiding this with the laptops underneath. As far as the sound went I wanted each screen to have its own speakers set up behind them so it would look like the sound was coming from the screens and they were talking to you. I managed to source three sets of dynamic speakers running off their own power and purchased three 5 metre mini jack to phono cables to run from the laptops to the speakers.


When I have been to galleries to look at video installations if projections are used rather than screens they are either back projected as I mentioned earlier or the projectors are on view. I am happy to keep the projectors on view BUT will need to hide the lap-tops. This will be done by setting up a table for the projectors to get them some hight for the projection, covering it in a black fabric and hiding the laptops underneath. The speakers will be raised off the ground by three black plinths and they will be connected by black cables.

SCREENS, SIZE AND BUILDING.
I did consider getting free standing screens but I did not want the clutter and loved "NOW" by Chantal Ackerman where she had slightly transparent perspex screens suspended from the ceiling and back projected onto them. My budget could not run to perspex (this idea would have to wait for another day) but I could suspend screens from the lighting rig. I have worked up a prototype screen. I made this using lengths of white photography backdrop paper from a spool I sourced. I will be attaching thin lengths of wood at the top and bottom the top one to fix and hang it from the ceiling and the bottom one to get the paper to hang straight. This worked well. lengths of strong enough fishing line or cord will secure these to the lighting rig.

Screen size was determined by the space itself and how far the projectors had to be from the screens to fill them. The bigger you needed the image to be the further away the projector needed to be and I ran some tests on the projectors to work this out. I also made lots of measurements of the studio space to determine its physical size and also where sockets and lighting rigs were for fixing the hanging screens to and to enable planning of the screen set up. the studio is 5.5m deep by 5m wide inside the black curtained area so this was the space I had to work with.

From looking at the measurements of the space I began to consider screen size. I wanted the biggest screen size I could find. I discovered that three widescreen 16:9 100' screens (221cm by 125cm) would fit but the angles that the screens would be at would be too tight to work with the video footage itself. They would also have to be too close together and the projectors would have to overlap to be far enough away to project fully onto a screen that big. this would also distance the audience from the piece as they would have to stand way back to avoid interfering with the projections which I did not want. 84" screens(186cm by 104cm) worked better but still the angle of the screens was also too steep and there was no space between the screens and the projectors would still have to be set too far back to allow the audience to get close avoiding the immersive experience I was after.

The ideal compromise was 72" screens ((159cm by 90cm). These allowed for a shallower angle if set up properly see right image below and allowed for the projectors to be set on the table 225 cm from the screen. Whilst still not exactly what I was after i did not want to compromise screen size any bigger as it kept the audience too far away. This is the set up I will be going with.

THE INSTALLATION SPACE
This will be a black box lit only by the screens and projections. One screen in the middle with two angles at about 30 degrees either side of it. All the screens will be the same size and at about eye level suspended fro the lighting grid. The projectors will be central on a table off the ground and this will be covered by black material with the laptops hidden away underneath. Speakers will be positioned behind each of the screens attached to the laptop playing their projection and therefore their sound. There will be a brief overview of the piece on the exhibition door explaining it.
Sunday, 1 May 2016
SIBLINGS: INITIAL POST PRODUCTION
Working with the footage of the first shoot it was very obvious that many of the issues that I flagged up were indeed just that and would need putting right with a second shoot. I am cutting Adobe Premiere Pro as I have the software at home and therefore I can use all available time and not be dependent on any outside sources.
SCALE OF THE EDIT
This is huge and complicated. Whilst having done the tests for screening to my MA peers I underestimated the size of the project as these had only been two or three clips edited together to check that they worked. I am aiming for the piece to be no more than 20 minutes. Whilst this is an OK length to work with in actuality it is 60 minutes to edit as I am actually doing three twenty minute edits in effect as I am editing for three screens! These all need editing, most of them lip-synching, the sound tidied up and watching to make sure no errors creep in.
USING PREMIERE PRO TECHNCALLY
The best way to approach the edit is to layer it all up in the timeline stacking it. This works best with what will be the left hand screen on video track 1 with the middle screen and right hand screen being on video tracks 2 and 3 respectively. Below I have given an outline of potential issues and opportunities of the project with one eye on re-shooting some elements and adding others to make the piece work better.

LENGTH OF INSTALLATION
Length of the films may have to be shortened. This is due to the above and also as I am sure I have only got 10 odd minutes to screen it to my tutors for assessment so perhaps working to a really tight best bits 10 minute edit is the way to go initially.
PROJECT FILE MANAGEMENT AND WORKFLOW
Getting organised is always the key to a successful edit and this is definitely the case he times 3! As there are three screens there are potentially three times the issues and confusion as a normal edit. I have decided to break all of the four areas up into there own folders teachers, boys, psychologists and parents creating folders to keep the files in. As far as file naming goes I have created a labelling system 1L Isaac Psychologists for example for when I have imported the raw footage. 1L being screen one left, Isaac being the boy in the clip and then whose thoughts they are saying. When editing I shot the boys all saying the psychologists thoughts for example as one long clip. Slicing this up into 8-9 sub clips will take an age SO I will edit all of one boys footage at a time in a sequence based on whose words they are voicing and slice it up in there into the 8-9 clips. Then slice up the other two boys too so for example the psychologists clips of all the boys will be in their own sequence. From here in the same sequence I will layer up the boys voices so that they are all combined and overlaid working together as they will be for the installation. Then these can be cut and pasted in to MASTER track containing all of the clips.

SYNCHING AUDIO
This is really tricky as if the boys were recorded at the same time it is less of an issue but the problem comes down to the actual screening. I can make these work in a timeline on the editing software fine but getting it all bang on. However for the pieces recorded individually with the boys that need adding together I will need to create the right spacing and fluidity as each son contributes.
SYNCHING AND PREPARING FOR THE INSTALLATION
NARRATIVE AND STRUCTURAL GYMNASTICS
This is the tricky bit and stringing all of the footage together. The bits with the boys interacting as a three all obviously work as they are pretty much appearing "as live" as they were recorded obviously considering the above factors. They are all on a certain screen and either left, middle or right. HOWEVER for the psychologists, teachers and some of the parents thoughts the boys are voicing this is a whole different story. I want to create a randomness as to which screen the boys appear on and also who speaks first, second and third and creating randomness is trick. I created some grids to help me do this and to help plan how to link and theme the sections together.

FRAMING THE TOPICS AND VOICES/OPINIONS
The plan is to have all of the boys on screen discussing either the same topic or different thoughts and aspects of the same topic. This will involve theming the comments of the psychologists, teachers and parents. For instance psychologists comments on the boys personalities for instance are they scholarly mathematically, with the written word or creative and artistic. Framing the comments in themes will allow the audience to get a feel for how the siblings are regarded birth order wise. Also getting one son to set up the theme of the three opinions "In class" for school to frame who the comments came from for instance.
NARRATIVE FLOW
Not 100% sure at the moment but i do want to give the piece some narrative structure and vary the contributors thoughts with the boys as they bring a real energy to the piece. As well as just contributions I want to give the boys screen time saying nothing on-screen and just observing them giving another insight into their characters by watching their physicality and how they inhabit the screen space. I do want to provide an opening though of the boys introducing themselves and also a sign out and summation at the end. Titles to introduce the piece will be added too.

RECORDING THE LIP-SYNC
As I have mentioned earlier in the blog the aim is to get FIRSTLY get the thoughts from the different people commenting on the boys, for instance teachers views written down. THEN record the boys saying their words on camera. THEN using these clips of the boys show these to the teachers so they can get a feel for their speech patterns and mimic them whilst recording the voice overs that will replace the boys voices. This is never going to be bang on unless time is not a factor but you can get pretty close and then any tidying up to get the lip-synch as bang on as possible done in the edit.
VO & LIP-SYNCH WORKING?
The comments from the boys voicing the words of others worked fairly well. I used a studio set TheVO I recorded of a lecturer friend (Matthew Townsend a performing arts lecturer and actor) to lip synch to the boys saying them worked really well and was a success. The process however can be time consuming to try and get the lip-synch as tight as possible I will need to get the other voice overs done ASAP as they are pretty time consuming to synch them to the boys voices in post.

GRADING AND MAKING THE FOOTAGE LOOK THE SAME
This is close but not white balancing during the filming and the different lighting colours some more orange, some bluer (see above photo). Using three identical cameras meant that this was not too much of an issue but there are difference between the boys images depending on which of the three positions they were filmed in. Colour grading is a huge job and being a perfectionist it was my original intention to get the images always looking identical in terms of shot size, background AND lighting and colour. HOWEVER I will work with what i have for now as different tones and slight changed in tone and colour are a little bit interesting and will review this after the edit is starting to take more shape.

This is huge and complicated. Whilst having done the tests for screening to my MA peers I underestimated the size of the project as these had only been two or three clips edited together to check that they worked. I am aiming for the piece to be no more than 20 minutes. Whilst this is an OK length to work with in actuality it is 60 minutes to edit as I am actually doing three twenty minute edits in effect as I am editing for three screens! These all need editing, most of them lip-synching, the sound tidied up and watching to make sure no errors creep in.
USING PREMIERE PRO TECHNCALLY
The best way to approach the edit is to layer it all up in the timeline stacking it. This works best with what will be the left hand screen on video track 1 with the middle screen and right hand screen being on video tracks 2 and 3 respectively. Below I have given an outline of potential issues and opportunities of the project with one eye on re-shooting some elements and adding others to make the piece work better.

LENGTH OF INSTALLATION
Length of the films may have to be shortened. This is due to the above and also as I am sure I have only got 10 odd minutes to screen it to my tutors for assessment so perhaps working to a really tight best bits 10 minute edit is the way to go initially.
PROJECT FILE MANAGEMENT AND WORKFLOW
Getting organised is always the key to a successful edit and this is definitely the case he times 3! As there are three screens there are potentially three times the issues and confusion as a normal edit. I have decided to break all of the four areas up into there own folders teachers, boys, psychologists and parents creating folders to keep the files in. As far as file naming goes I have created a labelling system 1L Isaac Psychologists for example for when I have imported the raw footage. 1L being screen one left, Isaac being the boy in the clip and then whose thoughts they are saying. When editing I shot the boys all saying the psychologists thoughts for example as one long clip. Slicing this up into 8-9 sub clips will take an age SO I will edit all of one boys footage at a time in a sequence based on whose words they are voicing and slice it up in there into the 8-9 clips. Then slice up the other two boys too so for example the psychologists clips of all the boys will be in their own sequence. From here in the same sequence I will layer up the boys voices so that they are all combined and overlaid working together as they will be for the installation. Then these can be cut and pasted in to MASTER track containing all of the clips.

SYNCHING AUDIO
This is really tricky as if the boys were recorded at the same time it is less of an issue but the problem comes down to the actual screening. I can make these work in a timeline on the editing software fine but getting it all bang on. However for the pieces recorded individually with the boys that need adding together I will need to create the right spacing and fluidity as each son contributes.
SYNCHING AND PREPARING FOR THE INSTALLATION
However even with these bits issues may creep in with sound overspill to the microphones of the other boys. If synchronicity of the clips and sound could be guaranteed to be 100% bang on then this is not an issue as the sound being played from all there clips to the screens would be in synch. However this looks very tricky and expensive to do for the installation. SO I will have to firstly erase any overspill from the other boys talking from the individual tracks so the only voice on each track will be the boy appearing on that screen. Then I will need to test and factor in the fact that the projections in the installation are unlikely to be bang in synch. So a pause (but not too long) will need to be left between each of the boys talking to allow for this so they do not end up talking over each other. It will be a "forced naturality" and will need testing on the screens ASAP to see what works best.
NARRATIVE AND STRUCTURAL GYMNASTICS
This is the tricky bit and stringing all of the footage together. The bits with the boys interacting as a three all obviously work as they are pretty much appearing "as live" as they were recorded obviously considering the above factors. They are all on a certain screen and either left, middle or right. HOWEVER for the psychologists, teachers and some of the parents thoughts the boys are voicing this is a whole different story. I want to create a randomness as to which screen the boys appear on and also who speaks first, second and third and creating randomness is trick. I created some grids to help me do this and to help plan how to link and theme the sections together.

FRAMING THE TOPICS AND VOICES/OPINIONS
The plan is to have all of the boys on screen discussing either the same topic or different thoughts and aspects of the same topic. This will involve theming the comments of the psychologists, teachers and parents. For instance psychologists comments on the boys personalities for instance are they scholarly mathematically, with the written word or creative and artistic. Framing the comments in themes will allow the audience to get a feel for how the siblings are regarded birth order wise. Also getting one son to set up the theme of the three opinions "In class" for school to frame who the comments came from for instance.
NARRATIVE FLOW
Not 100% sure at the moment but i do want to give the piece some narrative structure and vary the contributors thoughts with the boys as they bring a real energy to the piece. As well as just contributions I want to give the boys screen time saying nothing on-screen and just observing them giving another insight into their characters by watching their physicality and how they inhabit the screen space. I do want to provide an opening though of the boys introducing themselves and also a sign out and summation at the end. Titles to introduce the piece will be added too.

RECORDING THE LIP-SYNC
As I have mentioned earlier in the blog the aim is to get FIRSTLY get the thoughts from the different people commenting on the boys, for instance teachers views written down. THEN record the boys saying their words on camera. THEN using these clips of the boys show these to the teachers so they can get a feel for their speech patterns and mimic them whilst recording the voice overs that will replace the boys voices. This is never going to be bang on unless time is not a factor but you can get pretty close and then any tidying up to get the lip-synch as bang on as possible done in the edit.
VO & LIP-SYNCH WORKING?
The comments from the boys voicing the words of others worked fairly well. I used a studio set TheVO I recorded of a lecturer friend (Matthew Townsend a performing arts lecturer and actor) to lip synch to the boys saying them worked really well and was a success. The process however can be time consuming to try and get the lip-synch as tight as possible I will need to get the other voice overs done ASAP as they are pretty time consuming to synch them to the boys voices in post.

GRADING AND MAKING THE FOOTAGE LOOK THE SAME
This is close but not white balancing during the filming and the different lighting colours some more orange, some bluer (see above photo). Using three identical cameras meant that this was not too much of an issue but there are difference between the boys images depending on which of the three positions they were filmed in. Colour grading is a huge job and being a perfectionist it was my original intention to get the images always looking identical in terms of shot size, background AND lighting and colour. HOWEVER I will work with what i have for now as different tones and slight changed in tone and colour are a little bit interesting and will review this after the edit is starting to take more shape.
Thursday, 28 April 2016
SIBLINGS: STUDIO SHOOT 1
This was supposed to be the first and last studio shoot with my sons in the studio at Suffolk New College. I live in Braintree so getting the boys all to college was an effort especially as my wife who accompanied them to look after me and help out. The space was chosen for many reasons all listed below.

STUDIO SIZE AND SPACE
The size of the space as I really wanted all 3 boys to be able to set up 3 cameras and use the studio lighting rig to light and have room. Also the space would allow the boys to interact and bounce off of each other which I was unable to do at home due to room restrictions.
MISE EN SCENE
The MES would work well as I wanted a the boys upper torso showing shot against a black background which is possible in the studio and for the set to look very similar behind them all. The aim was to make it look stark, naked (physically and mentally) and to not detract the viewer so all they would see would be the boys and their attention would not be diverted elsewhere.
PRIVACY
Privacy as I could create a closed set and make the boys feel comfortable and as relaxed as possible.
EQUIPMENT
I would also be able to use all of the equipment I needed from the College store room as I needed a 3 camera and 3 sound rig set up to record all of the boys simultaneously in places. The kit used was 3 of all of the following. Canon 600D, 18-55mm lens, mains power so no need for batteries, TASCAM DR70D sound recorder, 3 Senheisser rifle mics and XLR leads, tripods, studio lighting rig and desk.
SOUND
Whilst sound was not 100% controllable it would be constant and would certainly be clean enough for my purposes.
AVAILABILITY
Availability to me in the evenings. I work at the college so I was able to acquire the space for use. This however was only outside college hours and as the college was only open in the evenings.
PLANNING AND PAPERWORK
I had worked out a production schedule, interview structure and the key comments and opinions for all of the "experts" on the boys and their thoughts on them from my research. Evidence of this is below.

The shoot itself was a little fraught with issues. Firstly there was a late start due to a student over-running in the studio who put my shoot back. This meant that even though the boys arrived at the college for 4:45 after I had set the studio up hurriedly making a few errors (see below) we did not start shooting until 6:30. This put HUGE pressure on the shoot and the boys were already a little bored and flagging. It also meant that I was an hour and a half behind schedule and continually fighting to try and catch up and get it ALL shot as the college closed at 9:00. Needless to say that I did not get it all shot, things did not run smoothly and other issues crept up. I have detailed all of these and there are plenty lessons to be learnt and things to consider for next time. This is because there will have to be a next time as I will need to go back and film again which will be a tough sell to the boys. Although they were promised lego sets and sweets as payment which did smooth the way somewhat.
MORE SET-UP TIME
More set-up time. The set up of the set took a little time and over-ran a little. It is a huge job for one person and mistakes were made. I should have white balanced each camera rather than set them all to the tungsten pre-set. This looks like possibly taking a lot of time in post-production to resolve.
STAGING OK
The set up did work and stools were a great idea, they set the boys higher and with a small seat stopped them wriggling around quite so much. The black background did give all of the boys shots a uniform look.
SHOOTING ORDER
Boys interactions first. Get the boys bits bouncing off of each other first THEN the single shots of the voicing the words of others. They are at their freshest earlier on and much more upbeat and natural
TALK THROUGH MORE WITH THE BOYS
Discuss things through even more with the boys. More discussions with them before the shoot about their statements and answers to questions that they were asked about them. These were reminders of pre-planned discussions on pecking order fastest, tallest etc.
UNSCRIPTED QUESTIONS
Unscripted questions? Also with the questions I attempted to throw some undiscussed questions in to them to see how they would react to these and it was a little confusing and most of the time did not work in front of camera. I also asked them to ask questions to their brothers about them. For instance "what am I best at". This did not work great first time around but after stopping the cameras and with some thinking time we did start to get there but it was hugely time consuming. It would also be good to discuss these a little beforehand and for me to remember that they are just little boys and not adults or seasoned interviewees. However they did work well and really add something and a different feel to the boys interviews.

TRANSPARENT FILMING
Chat through even more with the boys what the words of Parents, Psychologists and teachers are all about. This concerned them even though we have discussed it they needed reminding that these were not their words but the thoughts of others.
PLAYING TO THE CAMERA
The boys did play up for the camera at times a little too much. However as discussed earlier in the project representation on film is just that even in documentary especially when cameras are pointed at people they behave differently and the boys were no exception.
THREE CAMERA SET UP TRICKY
Three interviews at one. Working with the boys as a three is really tricky. Mistakes were made and blame was attributed creating uncomfortableness on the set and more stress. This was for me the sole operator triggering off 3 cameras and sound recorders as well as the boys themselves.

SEPARATE RECORDING OF OTHERS OPINIONS
Boys voiced thoughts of others. This worked well and were all shot as singles one at a time rather than all at the same time. However it does take time as ideally 20-25 seconds is needed before and after the have voiced the researched words of others in order to be able to cut them together with all three of them on-screen at a later date.
MANAGING TIME EXPECTATIONS
Trying to do too much. So as to have plenty of footage to work from in the edit I planned to overshoot. Working to the plan of documentary films working at a ratio of 40-50 to 1 was a daft idea as a lot of the footage here is scripted but I did still feel the need to overshoot to try and capture those "magic moments". In hindsight I was asking too many questions of the boys and a little editing may have been a good idea.
MORE TIME IN STUDIO & EARLIER START
An earlier start if possible. Tiredness was a huge issue as we started shooting late at 6:30 when the boys are usually winding down for bed. As the shoot went on they got more and more tired and grumpy and this was not conducive for capturing them on camera. The moodiness may be OK for the Psychologists roles etc but for getting the boys natural, fun and bouncing off each other it did not work the later we got. Ethically not a great plan either as there were a few meltdowns as the stress and tiredness got to them.

EXTRA MANPOWER
Kit operational issues due to me being a one man band with lots of technology to operate. Setting all of the cameras and sound recorders off was a pain. I could have got some help BUT the issue would have been the boys and them feeling comfortable and honest which they would not have felt had someone else been in the room. My wife was there acting as a production assistant which was a huge help but it was hard getting all the equipment going.
The shoot which drew to a close at 9:15 when we were thrown out as college was being closed up for the night. The following morning I had to strike the set but did make detailed notes of the set up and plans for the next time which there will have to be. I will also need to look at the footage and see if any other lessons can be learnt for the next time!


Tuesday, 26 April 2016
SIBLINGS: EXHIBITION TECHNICAL ISSUES AND DETAILS
The actual projection of the three films as a triptych comes with a few technical issues that need solving. These are outlined below.
The actual exhibition TV screens or projectors. The physical scale I want to screen them at is large as I want the boys to dominate the room and to make them larger than life. For this reason although I can get hold of TV's up to 40"-50" I am not sure they will be big enough. Projectors will allow much more scale but will demand a bigger space, screens, they can give slightly different looks and can be noisy. However projectors do seem to be the best way to proceed if I can get hold of three.


The screening environment and if I use a back, dark or white space and what sort of size etc is also an issue and also availability of these spaces. As I am aiming to project the installation and the projectors I will be using will not be high end due and possibly not have great brightness, or lumens, to cost the darker the better for the exhibition space. The black room at UCS would be OK but is very small. However we have a TV studio at the college that I work at that can be blacked out and is a much bigger space of about 5m squared. This will be a great environment and will have the scale that I am after.
Sound issues. Ideally I want a speaker behind each one of the screens. This should not be too much of an issue but I will need amplified speakers and one set for each of the projector screens. I will have to source these and see if I can borrow some as I want he sounds to be loud to attract the viewers attention to the relevant screen.
The actual exhibition TV screens or projectors. The physical scale I want to screen them at is large as I want the boys to dominate the room and to make them larger than life. For this reason although I can get hold of TV's up to 40"-50" I am not sure they will be big enough. Projectors will allow much more scale but will demand a bigger space, screens, they can give slightly different looks and can be noisy. However projectors do seem to be the best way to proceed if I can get hold of three.


The synching of the three screens so they interact with each other in synch. There is a little room for error within this BUT I will need to be careful. Ideally this is kept as unobtrusive as possible in the gallery space so as not to detract from the installation. There are expensive (£100's) ways to control this using MIDI and OCS (open sound controls) but these are technically very complicated. It could be done (albeit a little bluntly) by simply firing off three laptops at roughly the same time also but this involves lots of equipment and laptops that will need hiding in the set. However you can get media card players which are small and simply read the footage from memory cards, USB's and hard drives. These are about £30 each and very unobtrusive. If you get a few that are the same and set up the clips you should be able to fire all three off at the same time synching them.

The screening environment and if I use a back, dark or white space and what sort of size etc is also an issue and also availability of these spaces. As I am aiming to project the installation and the projectors I will be using will not be high end due and possibly not have great brightness, or lumens, to cost the darker the better for the exhibition space. The black room at UCS would be OK but is very small. However we have a TV studio at the college that I work at that can be blacked out and is a much bigger space of about 5m squared. This will be a great environment and will have the scale that I am after.
Sound issues. Ideally I want a speaker behind each one of the screens. This should not be too much of an issue but I will need amplified speakers and one set for each of the projector screens. I will have to source these and see if I can borrow some as I want he sounds to be loud to attract the viewers attention to the relevant screen.
Friday, 22 April 2016
NATURES TEST CARD VERSION 1 AND CRIT
Following on from my experiments and issues in moving forward enough to have much different to show in my Siblings piece (due to family commitments and their ill health) I have been working on the really early stages of my Natures Test card piece at home in and around the Siblings piece.
I have been researching around the idea a lot (see earlier post on this) and this is a rough demo version and culmination of these points. I explored doing it in After Effects but my skill level was not quite there yet but is developing. The easiest way to do a demo was in Premiere pro which really gives not much other than an idea for how the piece might work and a flavour of it. There are a few issues with the piece which I have listed below.
I have been researching around the idea a lot (see earlier post on this) and this is a rough demo version and culmination of these points. I explored doing it in After Effects but my skill level was not quite there yet but is developing. The easiest way to do a demo was in Premiere pro which really gives not much other than an idea for how the piece might work and a flavour of it. There are a few issues with the piece which I have listed below.
- The found photo images are Ok but a little Athena poster looking and too obvious.
- Movement is needed on the images to bring them to life need filmed footage to create life.
- Make more of the soundtrack. Only uses one soundtrack use lots more layers of sound to bring the piece to life.
- Avoid the obvious. Is it still too safe. Go even more abstract.
- Animals given very little character see sound above for how sound could improve this.
- narrative structure not really working and need to theme it. A day, passage of time, predator hunt etc.
- Larger scale images becoming smaller. Skyscapes, seascapes or landscapes to replace grey under the grid?
The piece was used at a critique of the work we have been developing so far to my MA peers and tutor and after the initial surprise as it is quite a move away from the siblings piece I received the following feedback.
- Think more about the relationship between sound, narrative and image.
- Saturate the image so it uses lots of different images to bombard the viewer.
- Possibly too busy with the grid
- The test card being used as a grid was lost on some of the audience even affirming the colour and nature link.
- Possibly try and project onto natural history film images.
- Think about sound working with the image more in parallel and/or contrapuntally with the images to add another dimension.
- More selective over images they are a little too obvious.
- Either make it more complex OR pare it right back.
All of this feedback was useful and moving forward I will consider it all especially the following areas.
- Make it more complex with the grid and images.
- More movement in the frames.
- Greater use and manipulation of sound.
- Build in narrative and themes. Day, chapters, events etc.
- Less obvious images to be used and a greater variety.
- Make it busier and a more aural and visual bombardment.
- Definitely add more large scale images in the background.
Friday, 15 April 2016
SIBLINGS: FILM LANGUAGE AND STYLE
From looking at the two versions I have done so far I realised that I need to try and explore and explain film techniques I am employing and why I am using these techniques a little further. What follows is a refresher skinny for me on the language of film and at the end of each area the techniques I have explored and am likely to employ.
MISE-EN-SCENE
Mise-En-Scene (MES) is a French theatre term used to describe “Setting the scene”. It is used to describe how the stage is set in theatre and obviously in film and TV how the scene is set.
MES comprises of the following areas.
Location
1: Provides a space for all of the MES factors to inhabit.
2: Can be used to set the tone. Ie. Dark haunted houses in Horror films.
3: Can be functional ie a bar or office that the characters frequent.
Props
1: Put in the location to help produce atmosphere and tone.
2: May be integral to the plot & used in the action. Action props ie. guns etc.
Costume
1: Can help to define a character. Lifestyle, job, class, place and time.
2: Can help define genre. Ie cowboy hats, guns etc define a Western.
Performance
1: Actors performance and expressions can be used to tell the story.
2: Verbally and non-verbally the actors pass on information to the viewer.
3: Stars can alter our perceptions of a role. Also stars may link to genres.
Lighting and Colour
1: Lighting decides what can be seen & therefore what is important in a shot.
2: Can be High Key ie bright locations or Low Key dark but lit in key areas.
3: Position of the lights can give various effects. Ie shadows in horror films.
4: Colour effects mood. Black can signify a bad guy, red passion, green envy.
Composition The way that the objects are composed in the frame can affect the way the viewer sees it. Symmetrical and balanced is comfortable; Asymmetrical is less balanced awkward and uncomfortable.
MY NOTES ON MES ON SIBLINGS:
Location
 Plain and stark possibly black. I have tried mock ups of different backdrops testing what it may be like to film them in the locations of the adults that they are representing on-screen see right. This included a school and psychologist type setting. However I do not want anything to detract from the boys or divert attention from them as they are the key to the piece. Also i like the ideas of the boys being naked from the waist up and their torsos showing and this looks very strange in these other locations and starts taking on completely different meaning and connotations.

Props
Simply not needed for the same reason as above. They will be sitting on chairs or stools but these will be out of shot.
Performance
 A tricky one as this is what the piece is based upon either performing as others OR performing a little for the camera. As much as possible I want them to NOT perform or be directed throughout especially in their own pieces where they are talking about themselves
Costume
None. I have tried variations of costume see images right to represent the different characters psychologist shirt and tie and even putting T shirts on the boys to cover them up and avoid the naked debate but this is not really working. I still love the boys personalities and identities being laid naked in reality and metaphorically and no shirts on works for this best. it also allows their physiques and physicality show through other things that define them and set them apart from their brothers.


Lighting and Colour.
The lighting was an issue as I really wanted the boys to look as natural as possible but filming in a TV studio meant no natural light. However the standard film and TV lighting set up for documentaries is three point lighting. A backlight to create a halo around the subject and separate them from the background really important when you have a black background as I aim to have. Then you have a fill light which gives a good overall light to the subject and this is generally 50% lower than the final light which is the key-light. The key light does most of the modelling to add shadow and depth to the subjects face. This set up will work best for me. I tried a few variations and some mood lighting effects for the 4 different aspects and people talking about the boys but it merely looked too contrived.

CINEMATOGRAPHY
This is another important tool that the filmmaker has at their disposal. It basically concerns how the camera is set up, the shots and camera movement and what exactly they decide to include in the frame and shoot. Framing What is included in the shot and the frame? Nothing else matters as this is what the filmmakers has decided is important for the viewer.
Shot Size
Camera Movement
This effects our perception of a shot and how the director has decided to follow the action. For instance in action films there will tend to be a lot of camera movement to inject energy and pace. There are 4 main types.
1: Pan (left to right)
2: Tilt (up and down)
3: Crane (camera moves up and down on a long arm)
4: Tracking (the camera moves on a set of tracks and a dolly)
There are also another couple of types you can use the camera handheld this adds a little more energy and roughness to the shooting. A steadycam is good for keeping the camera steady and following the action around. A zoom is not a camera movement but a lens movement.
Camera Angle
This is at what height the camera is placed. We usually view things at our eye level so if the director places the camera higher or lower it effects how the viewer perceives what they are looking at. There are 2 main types.
1: High angle positions the camera placed high up. This can give a good overall view of the scene and also can make the viewer feel powerful by looking down on the subject.
2: Low angle positions the camera is placed low possibly on the ground. This forces the viewer to look up at the subject making then feel weak.
Depth of Field
This what exactly is in focus in the shot. Obviously what is in focus is important, as it is what our eyes are drawn to and what the director wants us to look at. There are.
1: Shallow focus is when something in shot is in focus and nothing else is.
2: Deep focus is when the whole shot is in focus from the fore to background.
3: Pull focus. This is using shallow focus but moving it from one subject to another therefore highlighting one subject then another.
MY NOTES ON USE OF CINEMATOGRAPHY
As with all of my use of film language for this project the cinematography is also stripped back only to its bare essentials so the focus is solely on the boys.
Shot Size
 I tried shooting a few different ones to see what happened and if punching in for a CU from a MS for emotion worked and it did to an extent but lost the flow and honesty of the piece and made it look really contrived. I am aiming for a Cinema Vertie feel to the piece as well as being poetic to play with the audience perception of reality by looking like reality but actually being a created one. Leaving the shot size the same creates this look.

 I have also been very playful with the typical documentary talking head shot.I tried a variety of these see right to see what worked and the looser MCU nearly a MS worked best. It not only put some distance between the audience and the subject but allowed more torso to be seen. This was great for seeing the physicality of the boys another facet of their identity AND allowed for more moody movement that the tighter MCU and CU would not allow. Traditionally a documentary talking head shot is between a MS and MCU and is the de-facto interview shot. I liked the idea of mimicking this BUT breaking the fourth wall. This takes what the audience expect from a talking head interview but allows the subjects to directly address the audience a very privileged look in film and TV. This creates an uncanny subversive feel as most of what the audience expects is there but unlike they often see it.
Camera Movement
I did some tects with a bit of movement but everything I tried looked too forced and disrupted the impact of the shot size I mentioned above so did not pursue this too far.
Camera Angle
Again here I stayed to much of documentary convention and thinking by deciding to shoot them at eye level with the boys throughout. I did play around with shooting the adults bits from a lower angle so the boys would look more powerful in these parts especially the psychologist but again less is more proved to be the case. It looked too forced and feedback from a few colleagues suggested this too. I tried and only slight angles but it was simply not needed and eye level seems to be the way forward.
Depth of Field
Again not too much messing here. I wanted enough DOF for most of the features to all be sharp but as the background was black and there was nothing in the foreground it did not matter too much as long as the boys features were sharp.
SOUND
Sound can be split into two distinctive types that appear in films dependent on where they originate from and how they are used.
1: Diegetic sound is sound that originates from within the action in the film. Examples are dialogue, gunshots, cars screeching around corners etc.
2: Non-diegetic sound is from sources outside the action of the film. A typical example is music/soundtrack used to enhance the action but may also be, voice-overs or sound effects. An example may be a romantic couple running across a deserted field to the sound of orchestral music. This is Non-diegetic. If however the camera pans and there is an actual orchestra in the field with them it would be Diegetic!
Types Of Film Sound
Other types of sound that often appear in films would include.
1: Music creates mood. Horror music will be very different to romance.
2: Sound Effects are added to enhance scenes, gunshots, footsteps etc.
3: Ambient sound. Background sound to create atmosphere. Busy pubs etc.
4: Voice-overs are often used to fill in storylines or show character’s thoughts.
Using Sound In Film and Video
Sound can be used in various ways to have an effect on the viewer.
1: Parallel sound reflects action. For instance upbeat music in action scenes.
2: Contrapuntal sound goes against the action. For instance upbeat funny music in a violent movie scene. Makes the action seem even more graphic.
3: Sound Bridges is music or sound taking the viewer from one scene to another playing under both. Makes for smoother transitions linking the two scenes.
MY NOTES ON SOUND FOR SIBLINGS
The simple answer to most of the sound aspects above is to use a little as possible.
Diegetic Sound
This will simply be the boys voices themselves and any other sound generating form the scenes. I do not expect anything other than their voices and movements. The only interesting sound will be the use of lip-synched voice over with voices coming from the boys from the people whose opinions they are talking about replacing their own. In tone, pace timbre and phrasing of the boys will be the only constant wether their own words or repeating those of others.
Non-diegetic Sound
I do not plan on using any non-diegetic sound as I want the boys comments to remain clear and not start using music to create emotion but rather let this happen through what they say or do. I did do a couple of tests.
Sound effects.
These were tried at an earlier stage with computerised effects on the boys voices and was simply too ham fisted. This will be avoided as the "uncanny" is really interesting as strange voices appear to come from the boys.
EDITING
Editing is the end process where all of the shots, sound and other effects are all put together to form a completed film. As a viewer we have to suspend belief whilst watching a film as in real life we do not see things happening cutting from Long shots to Close ups but due to being exposed to film we do not question this. We traditionally cut straight from one shot to the next. There are two main types of editing, Continuity and Discontinuity.
CONTINUITY EDITING
Where the action is designed to appear to be flowing, so viewers do not question the cuts. One shot logically following the other smoothly and seamlessly. A number of techniques are used to make this possible.
1: Movement and speed. The action in the shots when linked must be at the same speed for it to seem continuous.
2: Shot Sizes. Traditionally we move from a WS to MS into a CU in the scene. This ensures interest and draws the viewer into the action after establishing it.
3: Shot reverse shot. This is where we see one character talking to another and then cut to whom they are talking to for their reply.
4: Eye line match. If you are using the above the eye lines must be the same, the characters must appear to have eye contact otherwise it will look strange.
5: Match on action. When we cut from say a MS of our character to a CU they must be in exactly the same position and the action must be the same.
6: Cutaway shots are edited into a scene but not directly related to it. They may show an important CU of something that is important to witness.
7: Cross or Parallel editing is when 2 storylines are intertwined through editing and shown next to each other. Ie people robbing a bank and the police heading to the bank cutting between shots of either to build tension.
DISCONTINUITY EDITING
Discontinuity where the action does not flow but has a disruption between one shot and the next but creating a representation of the action. Unlike continuity that supports meanings within the shot to represent narrative, Discontinuity editing produces meanings by the way that the shots are edited together.
There are several ways this can be achieved.
1: Montage. This is shots that when combined create meaning. An example is the famous Psycho shower scene not continuous action but edited to create a representation of the action.
2: A Graphic Match is when you cut from one shot to another but they are graphically the same size, composition, movement and shape.
3: A Freeze Frame is where the action freezes on screen. This gives the viewer more time to take in the information on screen. Lock, Stock uses this.
4: A Symbolic Insert is a shot inserted to give meaning or represent some action from the film. If a character is dying to represent death we may see a shot of a dead animal for example.
EDITING TRANSITIONS
As well as cutting straight from one shot to the next directly replacing one shot for another there are various transitions that can be used.
1: Fades often fade to black at the end of a scene and then from black into the next scene. These are good for showing a passage of time.
2: The new shot somehow Wipes across the screen replacing the old one.
3: With Dissolves the new shot appears through the old one replacing it.
PACE AND RHYTHMN OF EDITING
This is important as it creates a sense of mood or emotion in a scene. Dream sequences will have long shots and possible dissolves to create a dreamlike quality. Fast action scenes will have lots of hard cuts and shots to create the tension and pace of the scene.
MY NOTES ON EDITING FOR SIBLINGS
Again this will be as light a touch as possible so as to not interfere with what the boys are saying. I did try cutting some GV (general view footage) in really early incarnations of the piece but it simply did not need it and was far more interesting to allow the viewer to dwell on the boys.
Both continuity and discontinuity editing are not really used as the sections where the boys are talking are one long take each time. The only edits if you like are the creation of the boys taking it in turns to talk created in the edit when they were only shot one camera, but the aim is to make even these invisible and the focus not on techniques but on what they boys are saying.
That said there will be transitions between the sections and their comments. I have tried fades, and even wipes which i really hate to see if they work but fades to black and up again work best. They are almost a palette cleanser in between the sections showing an end in one and the start of another. They also allow a moment of suspense as to what the audience will see next and where the boys will pop up and what voices and action they may have.
Editing Effects
I tried out a few of these the B/W pixelated psychologists earlier on, even blue grading to make the psychologist look colder and the early brightly coloured animation effects but they were all too much. the nakedness of the boys and the thoughts of themselves and others on them work best when the footage is as naked as possible too.
That said i may try to grade the footage when it has been shot to try and give it a more uniford feel across all of it and add a title to the start but that will be about all.
MISE-EN-SCENE
Mise-En-Scene (MES) is a French theatre term used to describe “Setting the scene”. It is used to describe how the stage is set in theatre and obviously in film and TV how the scene is set.
MES comprises of the following areas.
Location
1: Provides a space for all of the MES factors to inhabit.
2: Can be used to set the tone. Ie. Dark haunted houses in Horror films.
3: Can be functional ie a bar or office that the characters frequent.
Props
1: Put in the location to help produce atmosphere and tone.
2: May be integral to the plot & used in the action. Action props ie. guns etc.
Costume
1: Can help to define a character. Lifestyle, job, class, place and time.
2: Can help define genre. Ie cowboy hats, guns etc define a Western.
Performance
1: Actors performance and expressions can be used to tell the story.
2: Verbally and non-verbally the actors pass on information to the viewer.
3: Stars can alter our perceptions of a role. Also stars may link to genres.
Lighting and Colour
1: Lighting decides what can be seen & therefore what is important in a shot.
2: Can be High Key ie bright locations or Low Key dark but lit in key areas.
3: Position of the lights can give various effects. Ie shadows in horror films.
4: Colour effects mood. Black can signify a bad guy, red passion, green envy.
Composition The way that the objects are composed in the frame can affect the way the viewer sees it. Symmetrical and balanced is comfortable; Asymmetrical is less balanced awkward and uncomfortable.
MY NOTES ON MES ON SIBLINGS:
Location
 Plain and stark possibly black. I have tried mock ups of different backdrops testing what it may be like to film them in the locations of the adults that they are representing on-screen see right. This included a school and psychologist type setting. However I do not want anything to detract from the boys or divert attention from them as they are the key to the piece. Also i like the ideas of the boys being naked from the waist up and their torsos showing and this looks very strange in these other locations and starts taking on completely different meaning and connotations.
Props
Simply not needed for the same reason as above. They will be sitting on chairs or stools but these will be out of shot.
Performance
 A tricky one as this is what the piece is based upon either performing as others OR performing a little for the camera. As much as possible I want them to NOT perform or be directed throughout especially in their own pieces where they are talking about themselves
Costume
None. I have tried variations of costume see images right to represent the different characters psychologist shirt and tie and even putting T shirts on the boys to cover them up and avoid the naked debate but this is not really working. I still love the boys personalities and identities being laid naked in reality and metaphorically and no shirts on works for this best. it also allows their physiques and physicality show through other things that define them and set them apart from their brothers.


Lighting and Colour.
The lighting was an issue as I really wanted the boys to look as natural as possible but filming in a TV studio meant no natural light. However the standard film and TV lighting set up for documentaries is three point lighting. A backlight to create a halo around the subject and separate them from the background really important when you have a black background as I aim to have. Then you have a fill light which gives a good overall light to the subject and this is generally 50% lower than the final light which is the key-light. The key light does most of the modelling to add shadow and depth to the subjects face. This set up will work best for me. I tried a few variations and some mood lighting effects for the 4 different aspects and people talking about the boys but it merely looked too contrived.

CINEMATOGRAPHY
This is another important tool that the filmmaker has at their disposal. It basically concerns how the camera is set up, the shots and camera movement and what exactly they decide to include in the frame and shoot. Framing What is included in the shot and the frame? Nothing else matters as this is what the filmmakers has decided is important for the viewer.
Shot Size
The size of shot decides how much information you as the filmmaker decide to shot the viewer. A long shot (LS) or wide shot (WS) contains a lot of
information and is good for establishing a setting or location. A close up (CU) is good for pointing out important detail ie a facial expression, a hidden gun.
Length of Take
Linked to shot size and editing. As a whole the more information that there is to take in from the shot the longer it needs to be. So a LS or WS will need to be longer than a CU as there will be more detail to take in.
Camera Movement
This effects our perception of a shot and how the director has decided to follow the action. For instance in action films there will tend to be a lot of camera movement to inject energy and pace. There are 4 main types.
1: Pan (left to right)
2: Tilt (up and down)
3: Crane (camera moves up and down on a long arm)
4: Tracking (the camera moves on a set of tracks and a dolly)
There are also another couple of types you can use the camera handheld this adds a little more energy and roughness to the shooting. A steadycam is good for keeping the camera steady and following the action around. A zoom is not a camera movement but a lens movement.
Camera Angle
This is at what height the camera is placed. We usually view things at our eye level so if the director places the camera higher or lower it effects how the viewer perceives what they are looking at. There are 2 main types.
1: High angle positions the camera placed high up. This can give a good overall view of the scene and also can make the viewer feel powerful by looking down on the subject.
2: Low angle positions the camera is placed low possibly on the ground. This forces the viewer to look up at the subject making then feel weak.
Depth of Field
This what exactly is in focus in the shot. Obviously what is in focus is important, as it is what our eyes are drawn to and what the director wants us to look at. There are.
1: Shallow focus is when something in shot is in focus and nothing else is.
2: Deep focus is when the whole shot is in focus from the fore to background.
3: Pull focus. This is using shallow focus but moving it from one subject to another therefore highlighting one subject then another.
MY NOTES ON USE OF CINEMATOGRAPHY
As with all of my use of film language for this project the cinematography is also stripped back only to its bare essentials so the focus is solely on the boys.
Shot Size

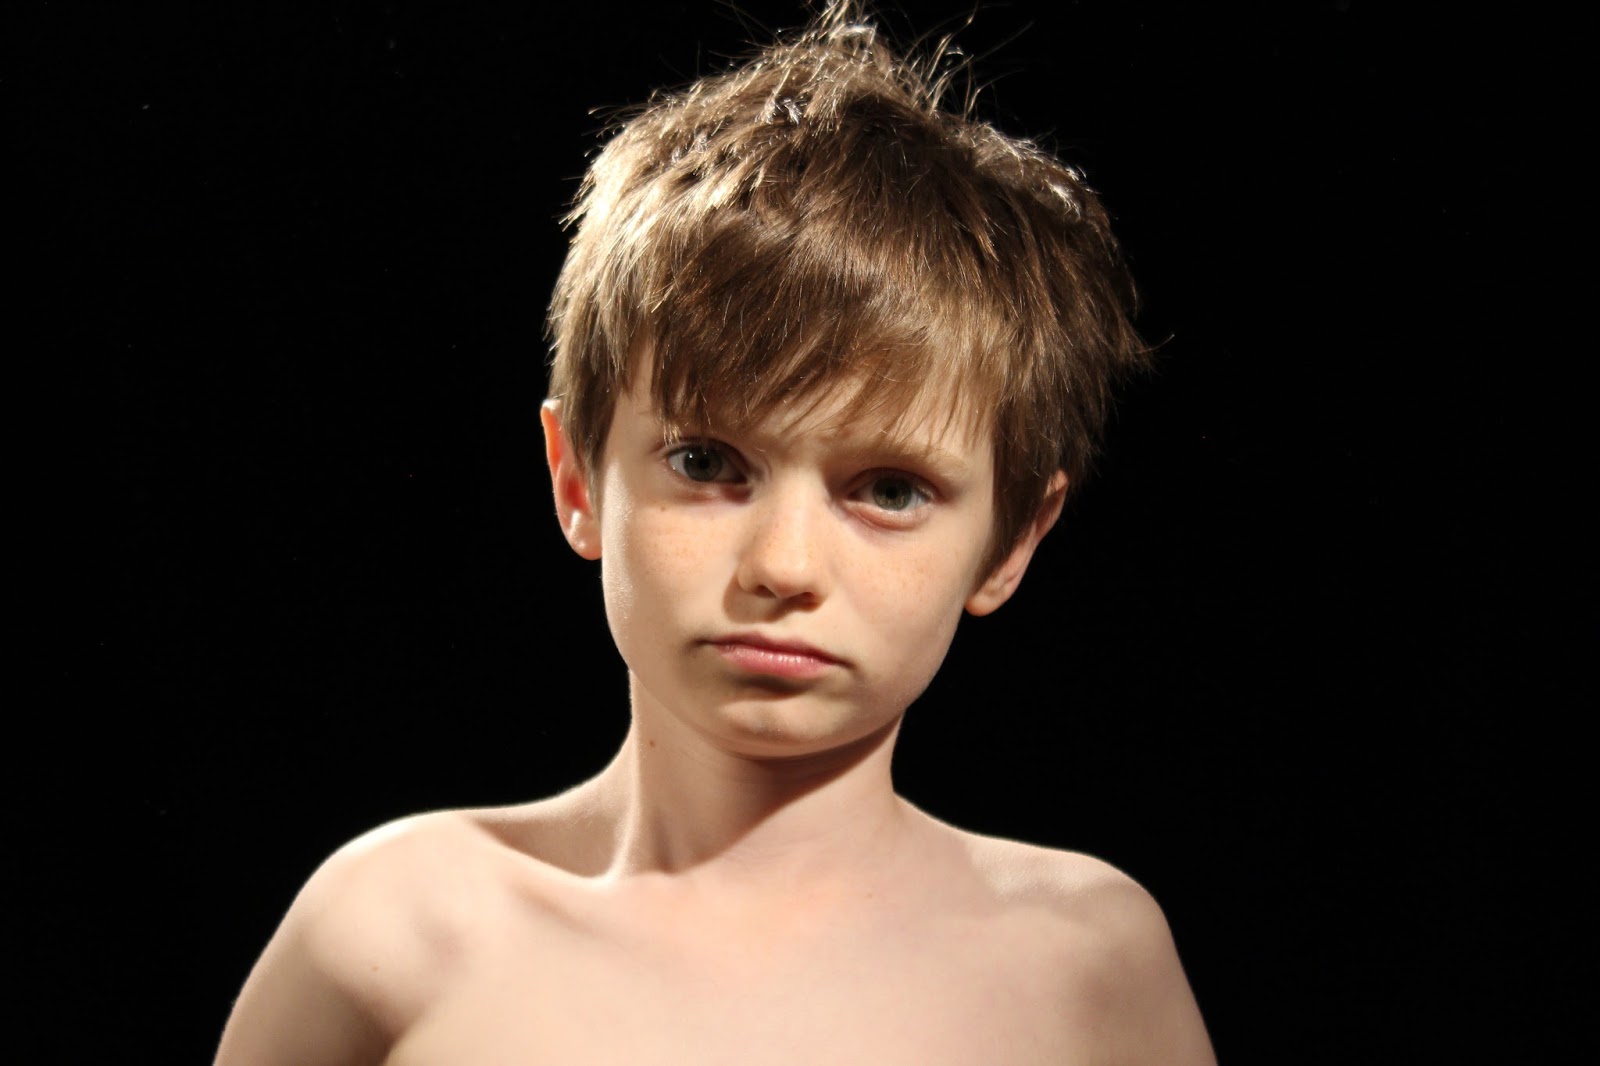
 I have also been very playful with the typical documentary talking head shot.I tried a variety of these see right to see what worked and the looser MCU nearly a MS worked best. It not only put some distance between the audience and the subject but allowed more torso to be seen. This was great for seeing the physicality of the boys another facet of their identity AND allowed for more moody movement that the tighter MCU and CU would not allow. Traditionally a documentary talking head shot is between a MS and MCU and is the de-facto interview shot. I liked the idea of mimicking this BUT breaking the fourth wall. This takes what the audience expect from a talking head interview but allows the subjects to directly address the audience a very privileged look in film and TV. This creates an uncanny subversive feel as most of what the audience expects is there but unlike they often see it.
Camera Movement
I did some tects with a bit of movement but everything I tried looked too forced and disrupted the impact of the shot size I mentioned above so did not pursue this too far.
Camera Angle
Again here I stayed to much of documentary convention and thinking by deciding to shoot them at eye level with the boys throughout. I did play around with shooting the adults bits from a lower angle so the boys would look more powerful in these parts especially the psychologist but again less is more proved to be the case. It looked too forced and feedback from a few colleagues suggested this too. I tried and only slight angles but it was simply not needed and eye level seems to be the way forward.
Depth of Field
Again not too much messing here. I wanted enough DOF for most of the features to all be sharp but as the background was black and there was nothing in the foreground it did not matter too much as long as the boys features were sharp.
SOUND
Sound can be split into two distinctive types that appear in films dependent on where they originate from and how they are used.
1: Diegetic sound is sound that originates from within the action in the film. Examples are dialogue, gunshots, cars screeching around corners etc.
2: Non-diegetic sound is from sources outside the action of the film. A typical example is music/soundtrack used to enhance the action but may also be, voice-overs or sound effects. An example may be a romantic couple running across a deserted field to the sound of orchestral music. This is Non-diegetic. If however the camera pans and there is an actual orchestra in the field with them it would be Diegetic!
Types Of Film Sound
Other types of sound that often appear in films would include.
1: Music creates mood. Horror music will be very different to romance.
2: Sound Effects are added to enhance scenes, gunshots, footsteps etc.
3: Ambient sound. Background sound to create atmosphere. Busy pubs etc.
4: Voice-overs are often used to fill in storylines or show character’s thoughts.
Using Sound In Film and Video
Sound can be used in various ways to have an effect on the viewer.
1: Parallel sound reflects action. For instance upbeat music in action scenes.
2: Contrapuntal sound goes against the action. For instance upbeat funny music in a violent movie scene. Makes the action seem even more graphic.
3: Sound Bridges is music or sound taking the viewer from one scene to another playing under both. Makes for smoother transitions linking the two scenes.
MY NOTES ON SOUND FOR SIBLINGS
The simple answer to most of the sound aspects above is to use a little as possible.
Diegetic Sound
This will simply be the boys voices themselves and any other sound generating form the scenes. I do not expect anything other than their voices and movements. The only interesting sound will be the use of lip-synched voice over with voices coming from the boys from the people whose opinions they are talking about replacing their own. In tone, pace timbre and phrasing of the boys will be the only constant wether their own words or repeating those of others.
Non-diegetic Sound
I do not plan on using any non-diegetic sound as I want the boys comments to remain clear and not start using music to create emotion but rather let this happen through what they say or do. I did do a couple of tests.
Sound effects.
These were tried at an earlier stage with computerised effects on the boys voices and was simply too ham fisted. This will be avoided as the "uncanny" is really interesting as strange voices appear to come from the boys.
EDITING
Editing is the end process where all of the shots, sound and other effects are all put together to form a completed film. As a viewer we have to suspend belief whilst watching a film as in real life we do not see things happening cutting from Long shots to Close ups but due to being exposed to film we do not question this. We traditionally cut straight from one shot to the next. There are two main types of editing, Continuity and Discontinuity.
CONTINUITY EDITING
Where the action is designed to appear to be flowing, so viewers do not question the cuts. One shot logically following the other smoothly and seamlessly. A number of techniques are used to make this possible.
1: Movement and speed. The action in the shots when linked must be at the same speed for it to seem continuous.
2: Shot Sizes. Traditionally we move from a WS to MS into a CU in the scene. This ensures interest and draws the viewer into the action after establishing it.
3: Shot reverse shot. This is where we see one character talking to another and then cut to whom they are talking to for their reply.
4: Eye line match. If you are using the above the eye lines must be the same, the characters must appear to have eye contact otherwise it will look strange.
5: Match on action. When we cut from say a MS of our character to a CU they must be in exactly the same position and the action must be the same.
6: Cutaway shots are edited into a scene but not directly related to it. They may show an important CU of something that is important to witness.
7: Cross or Parallel editing is when 2 storylines are intertwined through editing and shown next to each other. Ie people robbing a bank and the police heading to the bank cutting between shots of either to build tension.
DISCONTINUITY EDITING
Discontinuity where the action does not flow but has a disruption between one shot and the next but creating a representation of the action. Unlike continuity that supports meanings within the shot to represent narrative, Discontinuity editing produces meanings by the way that the shots are edited together.
There are several ways this can be achieved.
1: Montage. This is shots that when combined create meaning. An example is the famous Psycho shower scene not continuous action but edited to create a representation of the action.
2: A Graphic Match is when you cut from one shot to another but they are graphically the same size, composition, movement and shape.
3: A Freeze Frame is where the action freezes on screen. This gives the viewer more time to take in the information on screen. Lock, Stock uses this.
4: A Symbolic Insert is a shot inserted to give meaning or represent some action from the film. If a character is dying to represent death we may see a shot of a dead animal for example.
EDITING TRANSITIONS
As well as cutting straight from one shot to the next directly replacing one shot for another there are various transitions that can be used.
1: Fades often fade to black at the end of a scene and then from black into the next scene. These are good for showing a passage of time.
2: The new shot somehow Wipes across the screen replacing the old one.
3: With Dissolves the new shot appears through the old one replacing it.
PACE AND RHYTHMN OF EDITING
This is important as it creates a sense of mood or emotion in a scene. Dream sequences will have long shots and possible dissolves to create a dreamlike quality. Fast action scenes will have lots of hard cuts and shots to create the tension and pace of the scene.
MY NOTES ON EDITING FOR SIBLINGS
Again this will be as light a touch as possible so as to not interfere with what the boys are saying. I did try cutting some GV (general view footage) in really early incarnations of the piece but it simply did not need it and was far more interesting to allow the viewer to dwell on the boys.
Both continuity and discontinuity editing are not really used as the sections where the boys are talking are one long take each time. The only edits if you like are the creation of the boys taking it in turns to talk created in the edit when they were only shot one camera, but the aim is to make even these invisible and the focus not on techniques but on what they boys are saying.
That said there will be transitions between the sections and their comments. I have tried fades, and even wipes which i really hate to see if they work but fades to black and up again work best. They are almost a palette cleanser in between the sections showing an end in one and the start of another. They also allow a moment of suspense as to what the audience will see next and where the boys will pop up and what voices and action they may have.
Editing Effects
I tried out a few of these the B/W pixelated psychologists earlier on, even blue grading to make the psychologist look colder and the early brightly coloured animation effects but they were all too much. the nakedness of the boys and the thoughts of themselves and others on them work best when the footage is as naked as possible too.
That said i may try to grade the footage when it has been shot to try and give it a more uniford feel across all of it and add a title to the start but that will be about all.
Wednesday, 6 April 2016
NATURES TEST CARD DEVELOPMENT
Due to family illness (boys and wife) progress on filming the boys in the TV studio for my siblings piece has been slow. I may have to forgo getting them up there unless something breaks soon. However I have played around with the footage I have got and planned for the shoot by getting all of the pre-production planning ready. In this downtime I have also been working on the audio for the Poetic love piece and developing the Natures Test Card Piece.
NATURES TEST CARD
Having a career in film and TV there are certain artefacts and devices associated with the job that I use often without thinking and if you stop to think about it I am fascinated by. One of these is the test card used to balance and attune colours in TV both in production and post production. These are recognised by perhaps all (especially the BBC one) but often overlooked, unconsidered or not understood. Working in a visual art colour is hugely important too me and something that I appreciate everywhere and this overlaps into my love of the natural world. I am amazed by the colours apparent in the world around us and their often vibrancy and want to try and bring these two elements together. I want to explore the relationship between the two one being now computer generated and the other natural. I aim to try and collect moving video footage of the colours in a test card as represented in the natural world use them to replace them for the colours on a test card, with slowly moving images so subtle that the audience will hardly notice them moving at all until up close.


I have began to develop this idea inspired by the bright yellow rapeseed currently in the fields. I have added to the idea below and want to consider to explore my fascination of dissecting the documentary by trying to dissect that most formulaic of documentary the nature documentary. My manifesto for this project is outlined below in points and picks up on the themes I have been exploring all along.
DIGITAL COLLAGE
I have been looking at the work of a lot of montage especially pieces by photographers and Pop Artists I admire. Here is a link to my pinterest site where I have flagged up many of these. Inspirations include artists such as Robert Rauschenberg, Nam June Paiks multiple screen work, James Rosenquist as well as digital collage, animated GIFS and even the stained glass like grid art of Gilbert and George. Click below to view my pinterest board of ideas.
https://uk.pinterest.com/jonathansaward/ma-test-card-art/
MANIPULATE AND SUBVERT DOCUMENTARY FORM
In this case nature documentaries. Generally nature documentaries are only expository with the "voice of god" more often than not Attenborough explaining and providing the exposition. I want to see if the modes I have been exploring performance and in particular poetic can be used to blow this wide open.
BLURRING OF REPRESENTATION
How far can representations be blurred. In nature documentary already most things are a construct. It can take weeks to film for instance one cheetah hunt and kill. 10 or more hunts will be filmed generally by one sole cameraman or a couple and then used to construct the narrative of one hunt. I aim to exploit and expose this.
SHOOT NO ORIGINAL FOOTAGE?
Can you make a nature documentary without shooting any footage by recycling old footage. This is a staple of some nature documentaries using archive footage and could be used. I like the idea of creating a documentary without ever having shot a frame.
MULTIPLE HAPPENINGS AND STRUCTURE
Multiple screen happenings. nature does not happen one event at a time and I aim to try and reflect this. Multiple things happening, coming and going, picture and sound to try and construct a version of natural reality.
TECHNOLOGY AND NATURE IN PERFECT HARMONY?
Can technology and nature co-exist in the same piece side by side? What is the impact on one another. Can the test card tame nature and can nature wilden up the grid like test card.
EXPLORATION OF COLOUR
I have a real passion for colour and use it wherever possible in my work and will explore this to the hilt on this project. Colour wheels
NARRATIVE AND CHARACTER
I do still want to explore narrative and character. Character is tricky with animals and the natural world but I want to make sure that every element has an identity within the piece. Narrative is alos hard but through sound and image as well as placement i am sure i can build in narratives, animals hunting each other, day break to sunset, the seasons and such.
EXPLORATION OF TECHNIQUES
Exploration of technique. this will be sound but especially picture. Can test cards be used as a grid. Will this make the piece too busy.
VIDEO INSTALLATION?
I see the piece as being another video installation at this point. Huge, colourful, beautiful and ever changing on a gallery wall. Slowly imperceptibly moving like some nature can be so that the audience has to stay with it to notice its changes. I really want audience immersion on this piece and it to be almost a moving wallpaper.
USING TECHNOLOGY
Growing my use of technology. Previously I have tried to shoehorn technique onto pieces where it did not suit the subject-matter. Here I will need to develop new techniques and software skills as they are integral. Most notably I will have to get my head around Adobe After Effects to create the grid and many layers I will need.
FORMAL ELEMENTS
This project is also good for examining alongside colour the other formal elements of nature. Line, tone, texture, angle, space etc. By using close ups making things abstract and giving the piece a avant garde feel these can all be put under the spotlight.
Subscribe to:
Posts (Atom)